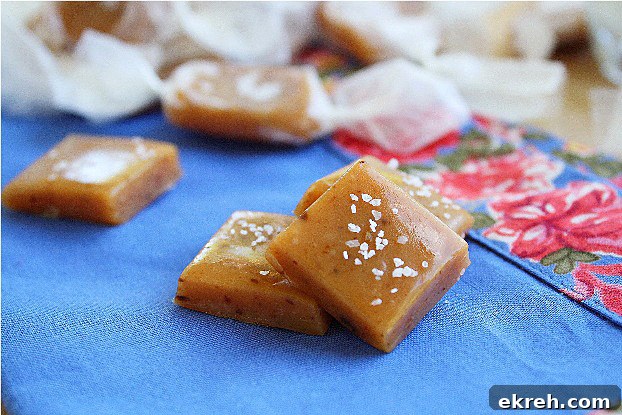

With Halloween arriving on Sunday, it feels like the perfect moment to share one of my favorite confections: sea salt caramel. This combination of buttery caramel and flaky sea salt delivers a delightfully sweet-and-salty contrast that melts on your tongue. It’s elegant enough to give as a homemade gift and simple enough to make in your own kitchen with just a pot, a spoon, and a baking dish. You don’t need advanced candy-making skills or any exotic equipment.
The contrast between smooth caramel and the occasional crunchy sea salt flake is what keeps people coming back for another piece. Each bite offers layers of texture and flavor — creamy, sweet, slightly bitter from the caramelized sugar, and brightened by the salt. That balance is what makes these caramels addictive.
In short, the method is straightforward: heat sugar with evaporated milk and heavy cream until the mixture comes to a simmer, stir in light corn syrup, then cook until it reaches the right temperature. Finish with butter and vanilla, stir until glossy and smooth, then fold in coarse sea salt. Pour the hot caramel into a prepared pan, chill until firm, and cut into bite-sized pieces. A simple refrigerator is all the cooling you need.
These caramels are versatile. Wrap individual pieces in wax or parchment paper for a candy-store presentation, tuck one into the center of a warm dessert for a molten surprise, or drop a cube into your coffee for a decadent twist. They also make lovely homemade gifts during the holidays—stack a few in a small box, tie with twine, and you have a thoughtful treat.
If you’re new to candy making, here are a few practical tips that will help you succeed: use a heavy-bottomed saucepan to distribute heat evenly and reduce the chance of scorching; stir constantly when the mixture approaches the target temperature to prevent burning; and oil or line your pan to make removing the set caramel easier. When cutting the caramel, a sharp knife lightly oiled will make clean cuts and prevent sticking. Sprinkle a few extra flecks of coarse sea salt on each piece right after cutting for a finishing touch.
Storage is simple: keep the caramels in an airtight container at a cool room temperature or in the refrigerator. Properly wrapped, they will stay fresh for a couple of weeks, making them a convenient make-ahead treat for gatherings or gift-giving.
I’m confident you’ll enjoy the silky texture of the caramel paired with the crunch of sea salt. The ingredients are easy to source, the process is forgiving, and the results are impressive. If I can make them, you can too. Happy Halloween—stay safe, wear a fun costume, and don’t be shy about keeping a few pieces of candy for yourself.
Speaking of sweets: what’s your favorite Halloween candy?
Sea Salt Caramel Candy
Georgia Johnson
70
(1-inch) pieces
Ingredients
-
1 3/4
cups
sugar -
1
12-oz. can
evaporated milk -
3/4
cups
heavy cream -
3/4
cups
light corn syrup -
2
tablespoons
butter -
1/4
teaspoons
vanilla extract -
1/2
tablespoons
coarse sea salt -
Oil or cooking spray
Instructions
-
In a large, heavy-bottomed saucepan, bring the sugar, evaporated milk, and heavy cream to a boil over medium heat. Add the light corn syrup and continue cooking until the mixture reaches 220°F (use a candy thermometer if you have one).
-
Add the butter and vanilla, then continue cooking while stirring constantly until the caramel reaches 225°F. Remove from the heat, stir in the coarse sea salt, and carefully pour the caramel into a lightly oiled 9″ x 13″ baking dish. Lining the pan with parchment paper can make removal easier.
-
Refrigerate for at least one hour, until the caramel is firm. Turn the pan out onto a cutting board lined with waxed or parchment paper. Using a sharp knife lightly oiled to prevent sticking, cut into 1-inch pieces. After cutting, sprinkle each piece with a few extra flecks of coarse sea salt for contrast.
-
Wrap caramels individually in waxed or parchment paper or place them in an airtight container. To present them candy-store style, wrap each piece and twist the ends. Store at cool room temperature (about 65°F) or in the refrigerator; they will keep up to three weeks when stored properly.
-
Enjoy!
Did you make this recipe?
If you try this recipe, please leave feedback and a rating. Tag @comfortcookingblog on Instagram to share your photos. Thank you!