
These Easter Bunny Milano Cookies are adorable, quick to make, and perfect for a no-bake holiday treat. Using store-bought Milano cookies makes assembly simple, so kids and adults can decorate together and create charming bunny faces for Easter brunch, snacks, or a festive dessert table.
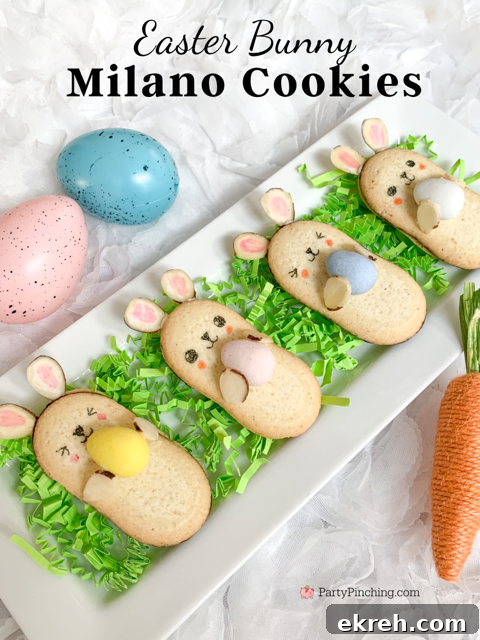
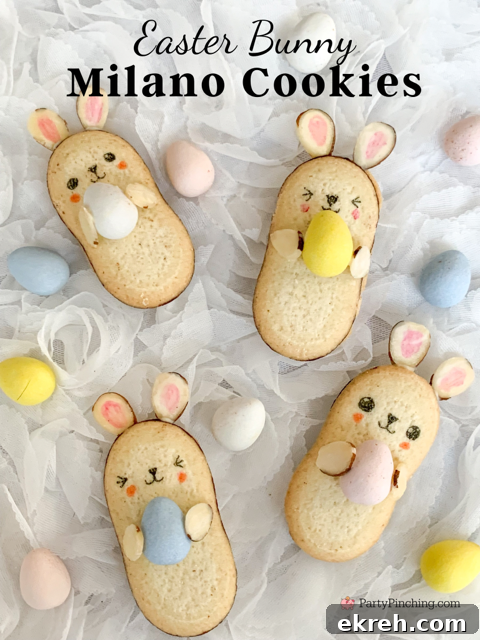
I loved how these turned out — so simple and so cute. Because they’re made with ready-made Milano cookies there’s no baking or special prep. Pick your favorite Milano flavor and gather a few small decorating supplies to transform them into little bunnies. The bright mini eggs or jelly beans add a colorful finishing touch that kids especially enjoy.
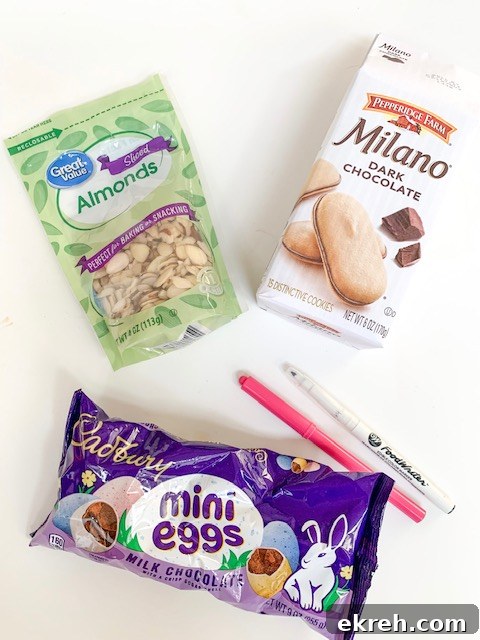
You will need:
- Milano cookies (or similar chocolate-filled sandwich cookies)
- Sliced almonds
- Small chocolate eggs (Cadbury Mini Eggs) or jelly beans
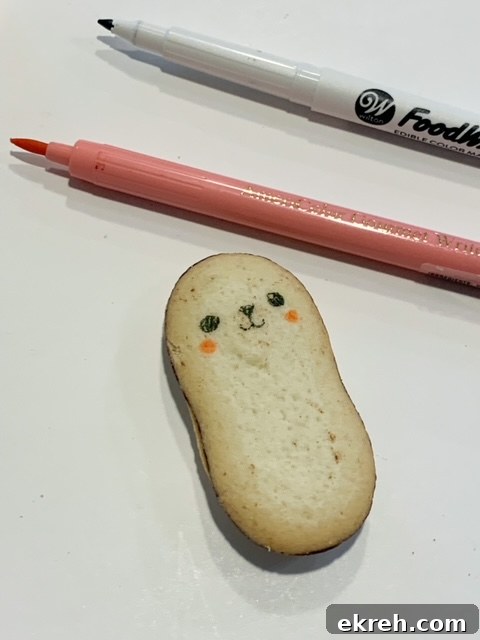
- Black and pink edible food markers
- Melted white chocolate (for attaching almond pieces and candies)
Step-by-step instructions
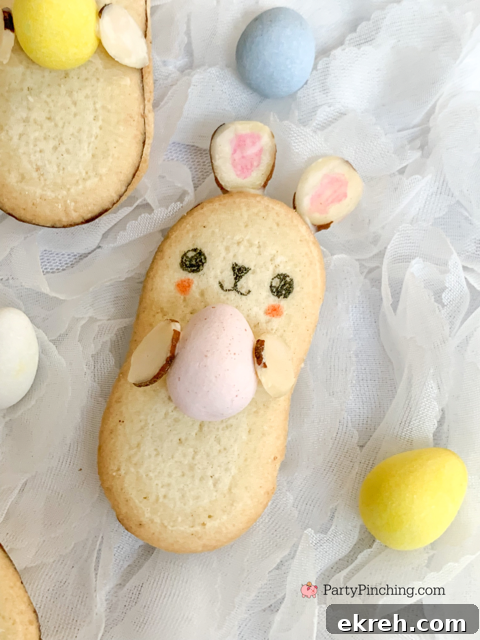
- Start by drawing the bunny’s face on the top of a Milano cookie using the black edible marker for eyes and whiskers and the pink marker for a small nose or blush. Keep the lines simple — a few dots and curved lines make a cute expression.
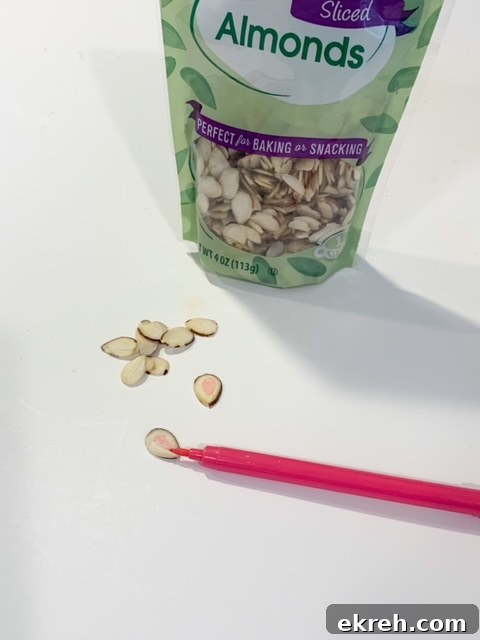
- Take two sliced almond pieces and color the inner portion lightly with the pink edible marker to create the inner ear color.
- Use a small dab of melted white chocolate to attach the almond slices to the top edge of the cookie, positioning them as bunny ears. Hold them in place briefly until the chocolate sets.
- Attach a mini chocolate egg or a jelly bean to the center top of the cookie with another small dab of melted white chocolate. This creates the look of the bunny holding a treat.
- Finish by adding two more almond slices to the sides near the egg to resemble the rabbit’s paws holding the candy. Add any extra face details with the edible markers as desired.
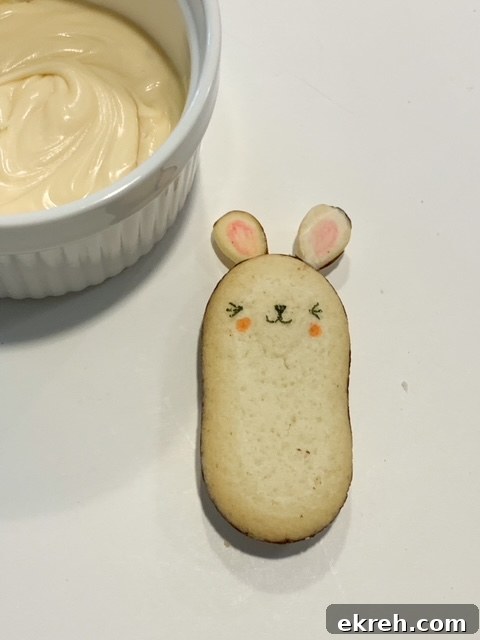
Now you have the cutest Easter Bunny Milano Cookies — quick to make and delightful to display. These are a great edible craft activity for children, and adults can join in the decorating for a relaxed family project. Make a tray of assorted faces with different expressions and colored candies for variety.
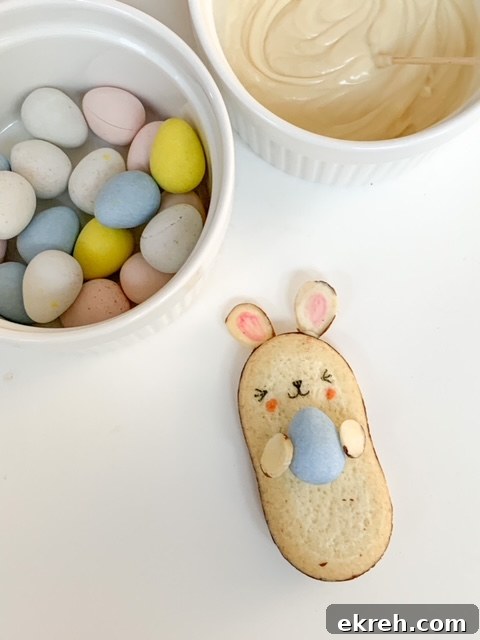
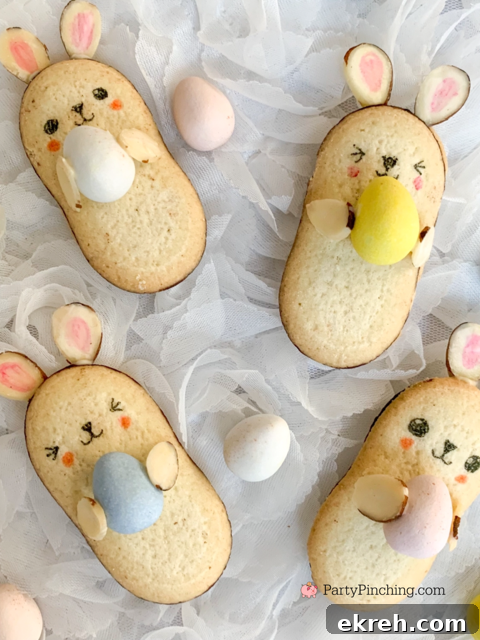
Tips and variations
- If you prefer, substitute thin chocolate chips or small candy melts for the melted white chocolate to attach the almonds and eggs.
- Try different Milano flavors — orange, dark chocolate, or mint varieties each give a slightly different look and taste.
- For younger children, pre-color the almond ears and pre-melt the chocolate so they can focus on sticking pieces together and decorating faces.
- Use assorted edible markers or tiny icing dots to add freckles, eyelashes, or little bow ties to personalize each bunny.
- To make the chocolate set more quickly, place finished cookies on a tray in the refrigerator for a few minutes.

Serving and storage
Serve these cookies on a decorative platter for Easter gatherings, or package a few in small cellophane bags as homemade party favors. Store finished cookies in an airtight container at room temperature for a day or two; if your kitchen is warm, refrigerate briefly so the chocolate attachments remain firm. Allow chilled cookies to come back to room temperature before serving for the best texture.
These sweet cookies are ideal for kids’ craft time and family baking-free decorating sessions. Have fun experimenting with faces and colors to make a whole bunny family for your Easter celebration.
Easter Bunny Milano Cookies
Yield: about 15 cookies
Prep: 5 minutes · Decorating: 20 minutes · Total: 25 minutes
Ingredients
- Milano cookies
- Sliced almonds
- Cadbury Mini Chocolate Eggs or jelly beans
- Black and pink edible food markers
- Melted white chocolate for adhering pieces
Instructions
- Draw bunny faces on each cookie with edible markers.
- Color two almond slices with the pink marker to form ear centers.
- Use melted white chocolate to glue almond ears to the top of the cookie.
- Attach a mini egg or jelly bean in the center top with melted chocolate, then add two almond “paws” to hold the candy.