Welcome — you’ve arrived just in time to see my newly refreshed virtual home.
The orchid ranks alongside the ranunculus as one of my favorite flowers. Traditionally associated with intense romantic desire and prized for its exotic beauty, the orchid has been a constant in my life. K gave me my first orchid back when we met, and orchids have remained a decorative staple in our home ever since. Saying I’m fond of them is an understatement.
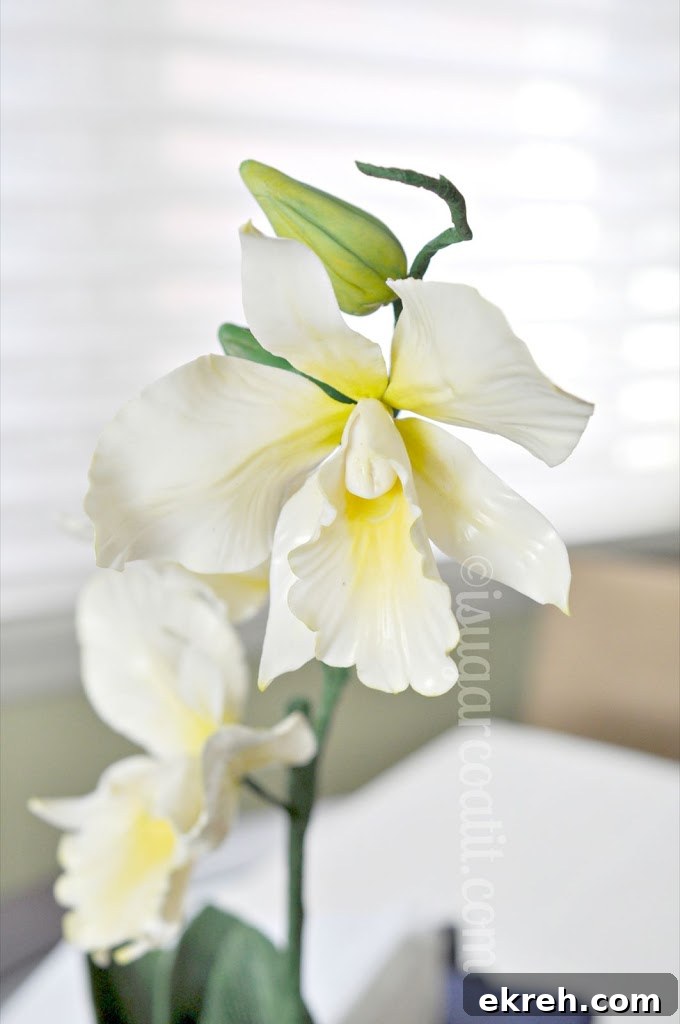
When I decided it was time to freshen up the blog, the first thing I wanted to add to the new design was orchids. Since this space is dedicated to all things sweet, of course my orchids had to be sugar-crafted — and naturally, they needed to be paired with a cake. I’ll get to that in a moment.
How can you not love my little green elephant with pink toenails? We don’t have pets at the moment, but if I could choose, my house would be full of elephants, great danes and polar bears. If forced to pick only one, elephants win. They are intelligent, emotionally rich creatures that form tight family bonds and live in matriarchal groups. I often joke that I may have been an elephant in another life — their gentle, social nature resonates with me. Someday I hope to visit an elephant sanctuary and spend time with them; when that day comes, I’ll share the experience here.
For now, meet the I Sugar Coat It! elephant — my first blog logo. He’s small, a little green, and he’ll show up to greet you on every visit with a treat in his trunk.
Back to the sugar orchids and the cake.
I received James Roselle’s Exotic Sugar Orchids Craftsy course as a gift and, after watching the lessons, I immediately knew how I wanted to use the finished flowers. I set out to recreate one of my own houseplants in sugar, translating living details into edible components.
You may have seen progress photos on my Facebook page a few weeks ago. This is the finished result. I extended beyond the course lessons and added leaves, buds, rocks, moss and a pot to hold the arrangement, creating a more complete and natural composition.
Each flower was wired using floral wire and wrapped with floral tape, forming small clusters and stems. I attached those wired blooms to a wooden dowel that serves as a support. To prevent direct contact between the wired assembly and the cake, I inserted a protective bubble straw down through the cake’s center and then placed the wrapped dowel into that straw. The course demonstrates a similar approach, with royal icing used for extra reinforcement in some instances.
For the decorative rocks, I blended white and dark modeling chocolate, then added color with food coloring and an airbrush to create realistic tones and texture. The moss is simply shredded coconut tinted with green food powder, offering both texture and flavor. Roots were modeled from fondant, while the leaves were created from a fondant and gum paste mix; the leaves were not wired and are held in place by the cake itself.
Carving the flower pot cake was not overly complicated, though this was my first time carving a cake and I admit I worried it might turn out lopsided. The finished cake contains two layers of vanilla and one of chocolate, all filled and crumb-coated with coconut-flavored Swiss meringue buttercream. The top is covered in chocolate fondant to appear like soil, while the sides are wrapped in white fondant textured with a basket-weave pattern to resemble a decorative pot. It’s both charming and delicious.
Help yourself to a slice and take a look around the renovated blog. There are a few final tweaks to make, but the tour will begin soon.